Showing posts with label recipe. Show all posts

Friday, November 23, 2012

Giving Thanks - Cupcake Style

I used to HATE Thanksgiving.  I was always thankful - don't get me wrong.  I just didn't enjoy the holiday.  Most of my family wasn't in the area, so we never had a big family gathering around the table.  It was me, sissy and mom.  A great group of ladies, but not really what I really had in mind for Thanksgiving.

Then, we had the idea to host Thanksgiving at our house - and all of my negative Nancy feelings about the holiday went right out the window.  Husbo's family are all in the area, and my family - without any super strong Thanksgiving traditions - were willing to travel.  So four years ago, we had our first Thanksgiving and have had it at our house ever since.  I'm not sure why I had a change of heart, but I don't question it, since it was a change for good.  Each year the group has been just a little different, but it's always family.  I love laying the table out, trying to figure out how everyone will fit the night before; making name cards and seating arrangements; helping husbo manage cooking times of all of his yummy dishes; and making cranberry sauce that I never eat because I prefer the stuff in the can.

Last year's Thanksgiving was especially special as we announced to our family that we were expecting our little cupcake, Amaya.  We had gift bags for everyone on the table, with sonogram pictures and t-shirts.  And this year, our little cupcake was stuffing her face with yams.  It was a very cool full circle moment.  Life is full of those, huh?

So, in the spirit of giving thanks and of the month of pumpkins, squash and all things quintessentially fall - I did a twist on last month's pumpkin cupcakes.  Same recipe, but with these sweet additions...

For the cake - toss about 2 cups of chocolate chips (dark, milk, bittersweet - pick your poison) in some flour.  The batter isn't thick enough to hold them up, and so if you don't coat 'em in flour they will all sink to be bottom - still good, but not really what you're going for!  Remove the excess flour (I put them through a sieve) and stir them in.  Be careful not to over stir our your cakes will be flat!

Then, for the frosting - add a dollop of pumpkin puree to it (or to taste).  It's got just enough pumpkin in there to amp it up a bit and really put you in the holiday spirit.


Sunday, November 11, 2012

Mummies and Ghouls and Spiders, Oh My!

Don't you just love the fall?  The colors, the clothes (man do I love me some boots and a cozy sweater!), the holidays and traditions...I love it all.  I also like the next couple of months because when I bake cupcakes for my class, it is easy to make themed decorations, starting with Halloween.

It was my daughter's very first Halloween, and one of my students got her the most appropriate and perfect costume (in addition to the owl her dad and I had already gotten)...a cupcake!  Now is this not the cutest little cupcake you have ever seen? >>  Next year I"m thinking round 2 with this costume...

I had two things to bake cupcakes for this month - one was my daughter's Halloween play date and the other was my normal baking for my class' birthdays.  I had big dreams of using fondant because of a cool idea I saw on Pinterest...but then the reality of mommyhood and lack of free time kicked me in the butt, and I "just" did frosting.  I'm still super pleased with the results, though, and based on the "no cupcake left behind" - my students thought they were pretty good, too!


For this, I turned to my trusty (and crusty) Martha Stewart book for this tried and true recipe...

Pumpkin - Brown Butter Cupcakes

3/4 cup butter (@ room temperature)
1 2/3 cup all purpose flower
2 tsp baking powder
1 tsp salt
1/2 tsp ground cinnamon
1/4 tsp freshly grated nutmeg  (I use more than this - I LOVE nutmeg, especially fresh)
1/8 tsp ground cloves
1 cup canned pumpkin puree (not pie filling)
1 cup packed light brown sugar
1/2 cup granulated shugar
2 large eggs

Preheat oven to 325.

In medium saucepan, melt butter over medium-low heat.  Swirl occasionally, until butter turns golden brown.  Skim foam from top and remove from heat.  Pour into bowl to stop the cooking - leave the crusty sediment in the saucepan.  Let it cool.

Whisk together flour, powder, salt, cinnamon, nutmeg, cloves.  In the bowl of your electric mixer, whisk puree, both sugars, eggs and brown butter mixture (after it's cooled).  Mix until just combined - don't overdo it or you're headed for flat top cupcakes!

Divide batter evenly and bake - rotating 1/2 way through.  Bake for 20 minutes or until a test stick comes out cleanly!

Top with cream cheese frosting and enjoy!!!  So, so good, my friends!

Sunday, October 14, 2012

Mudsliding into 30

I rang in my 30th, a little bit late, but in high style.  We threw a cupcake and champagne party where guests were asked to bring a bottle of bubbly or some cupcakes from their favorite spot (or their own kitchen!)  It was QUITE a successful night.  Lots of bubbly was imbibed and many sweet cupcakes were enjoyed.  

I, of course, had to whip something up for the occasion - so I went to my Pinterest board for some inspiration!  I have had lots of successes with the recipes I have found on there, and these Mudslide Cupcakes were no exception!  Lots of dishes - but worth it!  The cake is a kahlua chocolate and the frosting is a swirl of kahlua and bailey's buttercreams!  It was a bit challenging to achieve the swirl (even for my froster, my husbo Mike!)  Loved the overall taste and look, though!   


Friday, August 24, 2012

Cookie Dough Heaven - A.K.A. The Best Cupcake I Have Ever Made!!


Yikes - it's been a while.  I know.  But, I had a baby, and that kind of takes up some time!  Not to say I haven't been sampling cupcakes - I have.  But I haven't been writing about it!  I have not, however, baked a single thing since my last update in May...sad.  But, this weekend, on the eve of returning to glorious Fremont High School to begin my 7th year of teaching, I tied on my favorite apron, and pulled up a Pinterest recipe that made my mouth WATER!!

As I have posted before, I make cupcakes for my students (only 1 class, actually) once a month.  I have had a class of students for the last four years - we have had lots of highs and lows together, and this year is their senior year.  So, of course, the first cupcakes have to be that much more special than they have been all the other years!  This recipe seemed like a good way to bid farewell to a glorious summer, filled with trips, relaxation and most importantly, the birth of my amazing daughter.  And also a sweet ringing in of a new year - one that will surely be full of adventures both at school and at home.

On Pinterest, the poster said that she decided on French Vanilla cupcakes so as not to be too overly sweet.  WHAT?  How is that even possible?  I followed the OG recipe and went cookie dough - top to bottom: Frosting, Inside Stash and Cake.   And the result? These are the best cupcakes I have EVER made.  Ever.

They are so good, in fact, that I am making them for two events I have coming up this weekend!


The recipe can be found here - lots of dishes and lots of steps, but so worth it.  (And the batter and frosting are yummy too!!)


Friday, May 25, 2012

For Hire!

Baking is definitely a hobby - actually, an obsession.  I love the smell of rising cupcakes in the oven, and certainly the joy on people's (mostly my students') faces when I bring them to work or to a party.  My students often say I should go on Cupcake Wars - which is outrageous because I need a recipe in front of me the entire time and I double and triple check it (mostly the math if I am doubling or halving the recipe), and even then, I still manage to screw it up sometimes. My husband wants us to buy a food truck and sell away.  But for me, it's just a hobby.

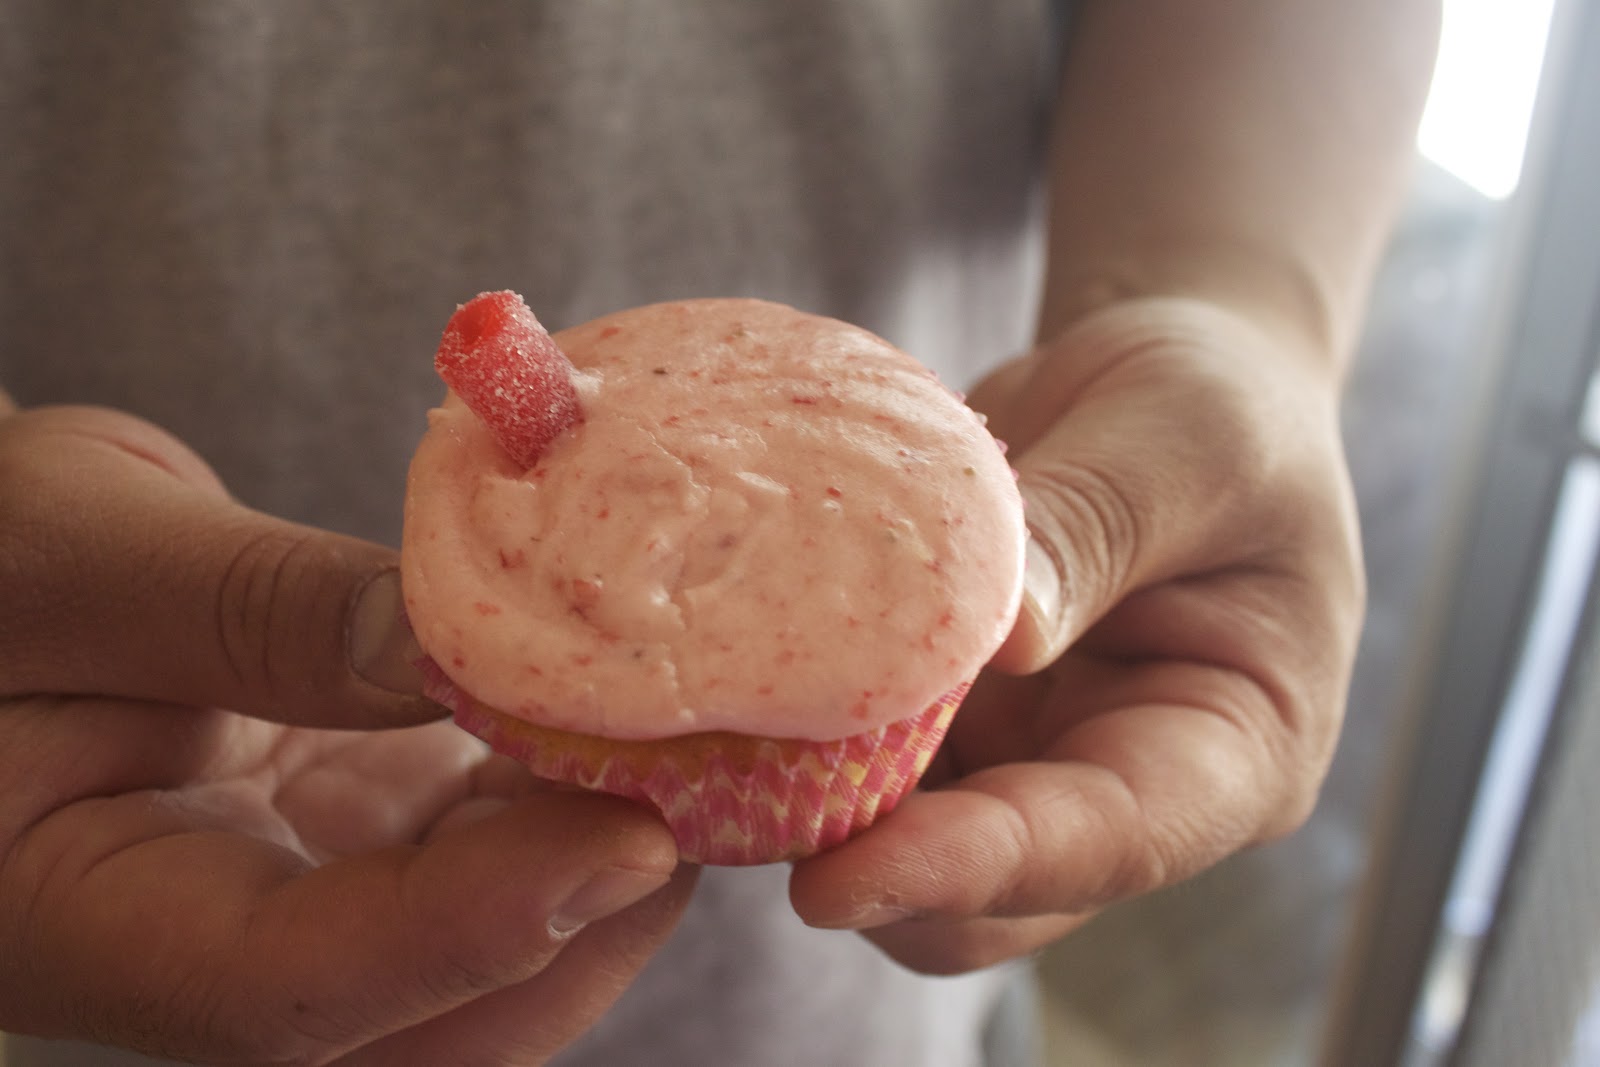
However, I won't turn away someone who wants to hire me to make something special just for them!  I was delightfully surprised when a friend Facebooked me to see if I would be interested in making cupcakes for her daughter's 1st birthday party.  After some important discussion about flavors, she decided on Strawberry Lemonade cupcakes - perfect for a hot summer day (which we have been having the last few days) and even more perfect for a little girl's party!

Cupcakes
From Half Baked - The Cake Blog

2 sticks unsalted butter, room temperature
2 cups sugar
4 eggs
3 cups all-purpose flour
2 tsp baking powder
1/2 tsp salt
1/4 cup lemonade powder mix
1 cup milk
3 Tbsp lemon juice (juice of 1 lemon)
1 Tbsp lemon zest (zest of 1 lemon)
1 tsp vanilla

Preheat your oven to 350 degrees and line your pan with your favorite cupcake liners!

In medium bowl, combine dry ingredients (flour, baking powder, salt, lemonade powder, lemon zest).  Set aside.

In your stand mixer, cream butter and sugar until light and fluffy.

Add eggs, one at a time.  Beat well after each and scrape down the sides so that everything combines.

Add lemon juice and vanilla - mix well.

Add dry ingredients in 3 batches, alternating with 2  additions of milk.

Fill your liners evenly and bake for 20 minutes!

These are nice and tart.  And then topped with the frosting - a perfect combo to refresh on a hot summer day!

Frosting
From Martha Stewart

I added a sour strawberry candy straw
1.5 cups fresh strawberries (rinsed, hulled, coarsely chopped)
4 large egg whites
1.25 cups sugar
1.5 cups unsalted butter, cut into tablespoons at room temp (unless it is like 400 degrees in your house, like it was in mine - then your frosting will be very runny...)

Puree strawberries in food processor.

Combine your egg whites and sugar in a heatproof bowl (of your standing mixer) over a pan of simmering water.  Whisk constantly by hand until the sugar is dissolved (should feel totally smooth when you rub between your fingers)

Put the bowl in the stand mixer and start whisking on low and gradually increase to medium/high until stiff peaks form.  Continue mixing until it is fluffy and glossy and completely cooled off from stove time! (about 10 minutes)

Start to add the butter a few tblsps at a time.  Mix well after each.  Then scrape down bowl and switch to paddle attachment - mix for 2 minutes on low to get all air bubbles out.  Add strawberries and beat until combined.

The frosting started drooping right away - "room temp"was just too hot for my butta.  But they tasted delish!

Saturday, April 21, 2012

Buzzzzzzed - Trying to Make it to Tax Day

My wonderful husband, is a CPA.  So every year, from mid January to mid April, I become a "tax widow."  Meaning that my husband leaves for work the same time I do (around 6:30) and gets home between 9:00 and 10:00 - enough time for a cocktail and then bed time.  Except this year, it was longer.  His "season" was unseasonably long, lasting from December through this past week.  It was pretty horrific.  But, the good news is, he's back!  Thank goodness - I miss the guy a lot when he's not around and our poor dog, Taiko, is beside himself with joy every night when Mike comes home.  He will not leave Mike's side for a second.

Many of the wives at the firm where my husband works, send baked goods to keep morale up and keep the CPAs on permanent sugar highs.  And I have tried to do my duty as well - sending in small batches of cupcakes here and there.  But during their last week, I decided to do something special, to keep them all wide awake in order to maximize productivity.

Yummmm - look at all of those coffee grounds....zzzziiing!!!


Vanilla Latte Cupcakes
From - Pink Parsley


Makes 18 cupcakes

Cupcakes

3/4 cup unsalted butter - room temperature
1.5 cups sugar
3 eggs - room temperature
2 cups all-purpose flour
1 tsp baking powder
1/8 tsp salt
1 tbs dark roast coffee grounds
1/2 cup strong brewed coffee
1/4 cup milk/buttermilk
2 tbs coffee liqueur or milk

Preheat oven to 350 degrees, and line your pans with your favorite liners.

In a stand mixer bowl, beat the butter at medium speed with paddle attachment for 30 seconds (until fluffy).  Add the sugar slowly, and beat until light and fluffy - about 3 minutes.

Add the eggs, one at a time, beating well after each.

In a medium bowl, whisk together flour, baking powder, salt and coffee grounds.

In a liquid measuring cup, combine brewed coffee, milk and liqueur.

Alternately add the flour and liquid mixture, starting and ending with the flour.  Mix on low and beat until just incorporated.

Divide batter evenly and bake for 18-22 minutes or until your toothpick/cake tester comes out clean as a whistle!

Frosting

3 large egg whites
1/2 cup granulated sugar
3/4 cup unsalted butter, cut into cubes (softened)
1/2 tsp pure vanilla extract
1 vanilla bean, split & scraped or 1 tablespoon vanilla bean paste
1 tbs instant espresso powder (or to taste) dissolved into 2 tsp boiling water
Pinch of salt

Combine egg whites and sugar in clean and dry bowl of a stand mixer.  Place over a pot of simmering water and heat - whisking constantly.  Sugar should be dissolved and the mixture should reach 160 degrees.

Attach bowl to mixer (with whisk attachment) and, starting at low and working to med-high, beat until the bottom of the bowl cools to room temperature and the egg whites are thick and glossy.  They should form soft peaks.

Continue whisking and add the butter, a few cubes at a time until all incorporated.  Continue mixing until the frosting comes together.  Switch to paddle and over medium speed, add vanilla, vanilla bean, coffee mixture and salt.  Adjust flavorings to taste.  Frost baby!

Tuesday, April 17, 2012

Holy Hiatus, Batman!

Yikes!  I have been baking like a fiend, but too darned busy to log it all!  Life is crazy, but in all the good ways, and has been filled with sweet treats these last few months.  I will take myself off of hiatus status in style, and share with you a very special cupcake that my husband and I have been working on.  


We are very excited to be expecting a baby girl in just 7 more weeks!  These beautiful photos were taken by Caroline Dahlberg of Coeur de La - definitely check her out.  She and her husband were amazing, and captured such an exciting part of our lives!!

The cupcake featured (the edible one) was a pink champagne cupcake - the recipe said that it "didn't matter" the type of champagne, but let me tell you...if you love champagne like I do, it totally DOES matter.  Don't skimp and go the cheap way.  But, they served their purpose on this day.  

Pink Champagne Cupcakes

What better way is there to celebrate than to fuse champagne and cupcakes?  I cannot think of anything more delightful :)

2 3/4 cups all purpose flour
3 teaspoons baking powder
1/2 teaspoon salt
3/4 cup butter
1 2/3 cups sugar
5 egg whites (give the yolks to your favorite pooch!  Mine loves them!)
2 1/2 teaspoons vanilla 1 
1/4 cups of your favorite champagne at room temperature (plus, pour a little extra into a flute to enjoy while baking!)
4-5 drops of red food color (I used bright pink - and mine turned out VERY pink!!)

Heat oven to 350 and line your baking dish with your favorite liners
Mix the flour, powder and salt in a medium bowl
Beat butter for 30 seconds, then gradually add your sugar - 1/3 cup at a time.  Make sure it is well incorporated before adding more
Once all the sugar is added, beat for 2 more minutes
Add egg whites, one at a time - beat well after each
Combine food coloring and champagne
Switch to low speed and alternate dry mixture (1/3 at a time) and champagne (1/2 at a time) - beat until JUST blended - no more or your cakes will be dense little bricks!

Divide batter and bake for 18-20 minutes
(Makes about 24 cupcakes)

Frosting

1/2 cup butter - softened
4 cups powered sugar
1/4 cup champagne
1 teaspoon vanilla
4-5 drops red food color

Throw it all in and mix until it is your desired consistency.  Put into your piping bag with your best tip, and frost away!!

Tuesday, October 4, 2011

An Apple A Day...

In the spirit of going back to school, I decided to make these lovely creations for my AVID class for their birthday celebration!


The cake was Martha Stewart's Apple Spice Cupcake recipe.  So delish and so moist!

Applesauce Spice Cupcakes

2 c all purpose floud
1 tsp baking soda
3/4 tsp salt
2 tsp cinnamon
1/2 tsp nutmeg
1/3 tsp ground cloves
1/2 cup (1 stick) unsalted butter @ room temperature
1 c granulated sugar
1/2 cup lightly packed light brown sugar
4 large eggs @ room temperature
1 1/2 c unsweetened apple sauce

Preheat to 350 F and line your cupcake tin with your favorite liners!

Mix together flour, baking soda, salt, cinnamon, nutmeg and clove in a medium mixing bowl.

In an electric mixing bowl (fitted with whisk attachment) cream butter and sugar on medium until light and fluffy.  Add eggs, one at a time, scraping down bowl as needed.  Switch to low and add applesauce and then flour - beat until just combined.

Fill tins to 3/4 with batter and bake for 20 minutes!

I then topped them with red and green fondant, and stuck a pretzel stick right in the middle (as the stem).  Then, a little green leaf, and we had a full fledged apple!  I coated the top of the cupcakes with a very light layer of cream cheese frosting, so that fondant would stick!

This is the first time I have made something with fondant for my AVID students, and they were pretty excited!  They took some of their own pictures :)  They then used them as brain food to study - I love those kids!


You can see the red and green varieties!  An apple a day keep these students ready to learn!


Saturday, September 24, 2011

Humming Right Along...Hummingbird Cupcakes

I have always believed that baked goods can (and should) brighten a person's day.  When I was growing up, my mom would lead us in baking copious amounts of Christmas goodies for our friends and neighbors.  We would wrap them up in cute or pretty boxes and people were always glad to receive them.  More recently, one of my students has begun delivering sweet treats to me.  She and her mom bake frequently - everything from cupcakes to blondies to lemon bars....and I sample them all!  Every time she shares her baking adventures with me, it is like the cherry on top of my day.

I was in a giving type of mood last week, and decided to whip up a batch of something new - Hummingbird Cupcakes.  Hummingbird cake, a Southern tradition, reportedly got its name because people would hum while baking it.  What a happy sounding cake!  Perfect to wrap up and gift to others.

Hummingbird Cupcakes


3 cups flour
1 tsp baking soda
1 tsp ground cinnamon (though I like to put in a bit more...)
1/2 tsp salt
1 cup (2 sticks) unsalted butter, melted and cooled
2 tsp pure vanilla extract
2 cups sugar
3 large eggs
2 cups mashed ripe banana (about 3 large ones)
1 can (8 oz) crushed pineapple, drained
1 cup chopped nuts (walnuts or pecans)
1 cup unsweetened shredded coconut


Top with Cream Cheese Frosting!!!


8 oz cream cheese at room temp
1 teaspoon pure vanilla extract
1/2 cup (1 stick) unsalted butter cut into pieces at room temperature
1 pound of confectioners' sugar, sifted


The thing about this frosting is, it's really about your taste buds.  If you like it more cream cheesy, add less butter, or the same amount of butter but more cream cheese.  The powdered sugar is what gives it a workable consistency, so you could add more than the pound if you feel that the frosting is still too thick for your liking.  


Then, put it all in a cute little box (I like mine with polka dots - from Michael's)...

Add a hand written note to pull it all together!


Monday, September 12, 2011

Life is but a Dream(sicle)

Last weekend, my wonderful Mother-In-Law, Sandy, celebrated her upcoming retirement.  She has been working at the same place for close to forty years!  Her colleagues threw her a celebratory bash, and requested a special batch of cupcakes.  I was more than happy to oblige!  Mike and I thought long and hard about which flavor to make her.  She likes chocolate, but that is so unoriginal - it's been done. We wanted something more festive and fun - kind of like my Mother-In-Law!  So we finally decided on Orange Creamsicle cakes, topped with homemade marshmallow and orange buttercream frosting.  Sound good?  They were, my friends.  They were.

Orange Creamsicle Cupcake
Recipe from Home is Where the Holmans Are (blogspot)

Ingredients
1/2 cup (1 stick) of unsalted butter room temperature
2 tablespoons of citrus olive oil (you can make your own by putting some orange and lemon peels/zest in some olive oil - that's what we did!)
1 cup sugar
2 tablespoons vanilla
2 eggs
Zest of 1 orange
2 cups all purpose flour
1/4 teaspoon baking soda
1/4 teaspoon baking powder
1/4 teaspoon salt
3/4 cup heavy cream
1/4 cup freshly squeezed orange juice
It took a lot of oranges...Good thing I'm so strong :)
Combine butter, sugar and oil on high until light and fluffy!  Add eggs and vanilla and mix for another minute.  This is where things start to smell fruity!  Stir in your orange zest.

Combine your dry ingredients in a bowl.  Mix thoroughly so you spread out all ingredients equally.  Then, mix your remaining wet ingredients (OJ and cream).  Beat in dry ingredients in 3 batches - alternate with 2 batches of the wet.  Stir until just combined.  Don't overdo it!                                                                  


Line your cupcake tray with your favorite liners.  Scoop in until 3/4 full, bake for 20 minutes at 350 or until your cupcake tester comes out without a crumb!


After your cakes have cooled off, use an apple corer to punch out the center.  You will fill this little spot with the marshmallow filling (see below).


I love this because you get these little bite size samples.  Look closely and you can see the zest!
Marshmallow Filling

Ingredients
8 egg whites, room temperature (ever wondering what to do with the yolks?  One or two are a great treat for your canine sous chef.  Taiko loves 'em)
2 cups sugar
1/2 teaspoon cream of tartar
2 teaspoons vanilla
                                    

Put a solid dollop of this yummy stuff on there!
                                    
Orange Buttercream

Ingredients
1/2 cup or 1 stick of unsalted butter at room temperature
1/8 cup of freshly squeezed OJ
Zest of 1 orange
1/4 teaspoon vanilla extract
4 cups powdered sugar

Beat butter on medium until it is light and fluffy.  Add orange juice, vanilla  and zest and mix until combined.  Add powdered sugar until it is the consistancy you want.  

*I might consider adding a dollop of orange food coloring to brighten this up a bit.  Ours wasn't as bright of an orange as we were hoping for!


We stuck a popsicle stick in there for the cute factor!

Saturday, August 27, 2011

Ladybugs! (My first adventure with fondant)

My good friend, and colleague, Eric, invited us to his adorable daughter's 2nd birthday party today.  The Evite was full of cute little ladybugs, and so I asked if that was the theme of the party?  His reply: "No, that was just the cutest Evite option."  Very much an Eric response.  However, I already had it in my mind that I wanted to make ladybug cupcakes (inspired by the Evite), so even though it wasn't the official theme, we still went ahead!

I shared my idea with Mike, my husband, and he helped brainstorm what the best possible way to tackle these bugs would be.  He chose the cupcake flavor for the day, ran to the store, and our adventure began.

When you have such a fun decoration on the top, and when you are making cupcakes for a 2nd birthday, it probably isn't super important what type of cupcake is underneath.  But, I care.  And I knew a lot of my friends and colleagues would be there, and they would appreciate a yummy cupcake that wasn't just cute, but delicious as well.  We decided to go with a Devil's Food chocolate cupcake.  I LOVE this recipe (have I written about it before?)  The sour cream makes it so flippin' moist - it is the best chocolate cupcake ever.  Seriously.

Fresh outta the oven!
 For some reason these turned out exceptionally well.  I think I am just figuring out (after all of my practicing) how much I need to fill up those lovely little cups.  I was really excited about this.  Before today, I always seem to have like 1/2 meh looking cupcakes and then 1/2 blob looking (where I put way too much in and it spills up over the cup...)  Not cute.

These would probably taste bomb with my new favorite cocktail - Sweet Tea Vodka + Lemonade....
Just saying...
 Once they cooled, we were ready to move onto the next step: fondant.  This was our first time working with fondant, so we were a little nervous.  Especially since we were making them the same day as the event.  Probably not the best idea!  While the cuppies were cooling and second batch was in the oven, I prepared for the next step.

I love this thing.  I got two of them for my bridal shower, and I think they are the bee's knees. 
They're done!  Read to be ladybugged!
Another bridal shower gift - today's apron of choice.

 So, fondant is weird looking.  It looks, to me, like a huge brick of lard.  Not very appetizing.  It was hard for me to imagine how we were going to transform this blob into something cute for a kid's birthday party.
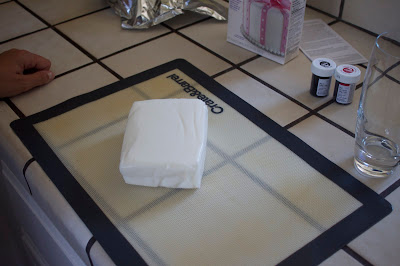
Bloooooooooobbbbbbbbb......
We divided the fondant into our two colors.  1/3 was dyed black and 2/3 red.  This stuff stains your hands.  For real.  I look like I wrestled some beets (according to Mike).  But, it started to look a little more interesting!
Our fondant dye
Fondant is pretty easy to dye.  But, as I said, messy.  It is a good arm workout though.  When it starts to get sticky, you just sprinkle a little bit of powdered sugar in there, and bam!  Good to go.


Then, it was time to get rolling!  Mike rolled out the fondant into a thin layer.  He is very good at this job.

Then, we took one of our cups, and cut out red rounds.  These are going to be our ladybug base.

In order to get the fondant to stick, we put a very thin layer of frosting on there.  By thin, I mean VERY thin.  Due to time constraints, we just used store bought frosting (shhhhh - don't tell anyone!)  But whatever - one less dish, thank goodness!

We popped those red discs on right away, and they looked so cool!  I mean, they didn't really need much else IMO, but we knew they could only get cuter!  There was something both Mike and I appreciated about the smooth and clean line that the fondant created.  It just looked so neat and tidy!  Something we both love.


From there, we started crafting their little heads.  For this, Mike simply took the edge of the same cup to create little parts of discs that folllowed the same curve as the red rounds.

To get the black to stick on top of the red fondant, we brushed it with just a little bit of water!  Stayed on like glue!

After that, it was eye balls (and we used white decorating pearls) and their little dotted backs.  For the polka dots, we actually used the tip of a piping tip - size #12.   It worked perfectly!


We got to the birthday party, and saw the cute printed table cloths - ladybug!  Our cupcakes fit right in!


We thought it was a success, but the ultimate judge was, of course, the birthday girl, Marisa.  Here's what she thought:


LinkWithin

Related Posts Plugin for WordPress, Blogger...