Friday, August 24, 2012

Cookie Dough Heaven - A.K.A. The Best Cupcake I Have Ever Made!!


Yikes - it's been a while.  I know.  But, I had a baby, and that kind of takes up some time!  Not to say I haven't been sampling cupcakes - I have.  But I haven't been writing about it!  I have not, however, baked a single thing since my last update in May...sad.  But, this weekend, on the eve of returning to glorious Fremont High School to begin my 7th year of teaching, I tied on my favorite apron, and pulled up a Pinterest recipe that made my mouth WATER!!

As I have posted before, I make cupcakes for my students (only 1 class, actually) once a month.  I have had a class of students for the last four years - we have had lots of highs and lows together, and this year is their senior year.  So, of course, the first cupcakes have to be that much more special than they have been all the other years!  This recipe seemed like a good way to bid farewell to a glorious summer, filled with trips, relaxation and most importantly, the birth of my amazing daughter.  And also a sweet ringing in of a new year - one that will surely be full of adventures both at school and at home.

On Pinterest, the poster said that she decided on French Vanilla cupcakes so as not to be too overly sweet.  WHAT?  How is that even possible?  I followed the OG recipe and went cookie dough - top to bottom: Frosting, Inside Stash and Cake.   And the result? These are the best cupcakes I have EVER made.  Ever.

They are so good, in fact, that I am making them for two events I have coming up this weekend!


The recipe can be found here - lots of dishes and lots of steps, but so worth it.  (And the batter and frosting are yummy too!!)


Friday, May 25, 2012

For Hire!

Baking is definitely a hobby - actually, an obsession.  I love the smell of rising cupcakes in the oven, and certainly the joy on people's (mostly my students') faces when I bring them to work or to a party.  My students often say I should go on Cupcake Wars - which is outrageous because I need a recipe in front of me the entire time and I double and triple check it (mostly the math if I am doubling or halving the recipe), and even then, I still manage to screw it up sometimes. My husband wants us to buy a food truck and sell away.  But for me, it's just a hobby.

However, I won't turn away someone who wants to hire me to make something special just for them!  I was delightfully surprised when a friend Facebooked me to see if I would be interested in making cupcakes for her daughter's 1st birthday party.  After some important discussion about flavors, she decided on Strawberry Lemonade cupcakes - perfect for a hot summer day (which we have been having the last few days) and even more perfect for a little girl's party!

Cupcakes
From Half Baked - The Cake Blog

2 sticks unsalted butter, room temperature
2 cups sugar
4 eggs
3 cups all-purpose flour
2 tsp baking powder
1/2 tsp salt
1/4 cup lemonade powder mix
1 cup milk
3 Tbsp lemon juice (juice of 1 lemon)
1 Tbsp lemon zest (zest of 1 lemon)
1 tsp vanilla

Preheat your oven to 350 degrees and line your pan with your favorite cupcake liners!

In medium bowl, combine dry ingredients (flour, baking powder, salt, lemonade powder, lemon zest).  Set aside.

In your stand mixer, cream butter and sugar until light and fluffy.

Add eggs, one at a time.  Beat well after each and scrape down the sides so that everything combines.

Add lemon juice and vanilla - mix well.

Add dry ingredients in 3 batches, alternating with 2  additions of milk.

Fill your liners evenly and bake for 20 minutes!

These are nice and tart.  And then topped with the frosting - a perfect combo to refresh on a hot summer day!

Frosting
From Martha Stewart

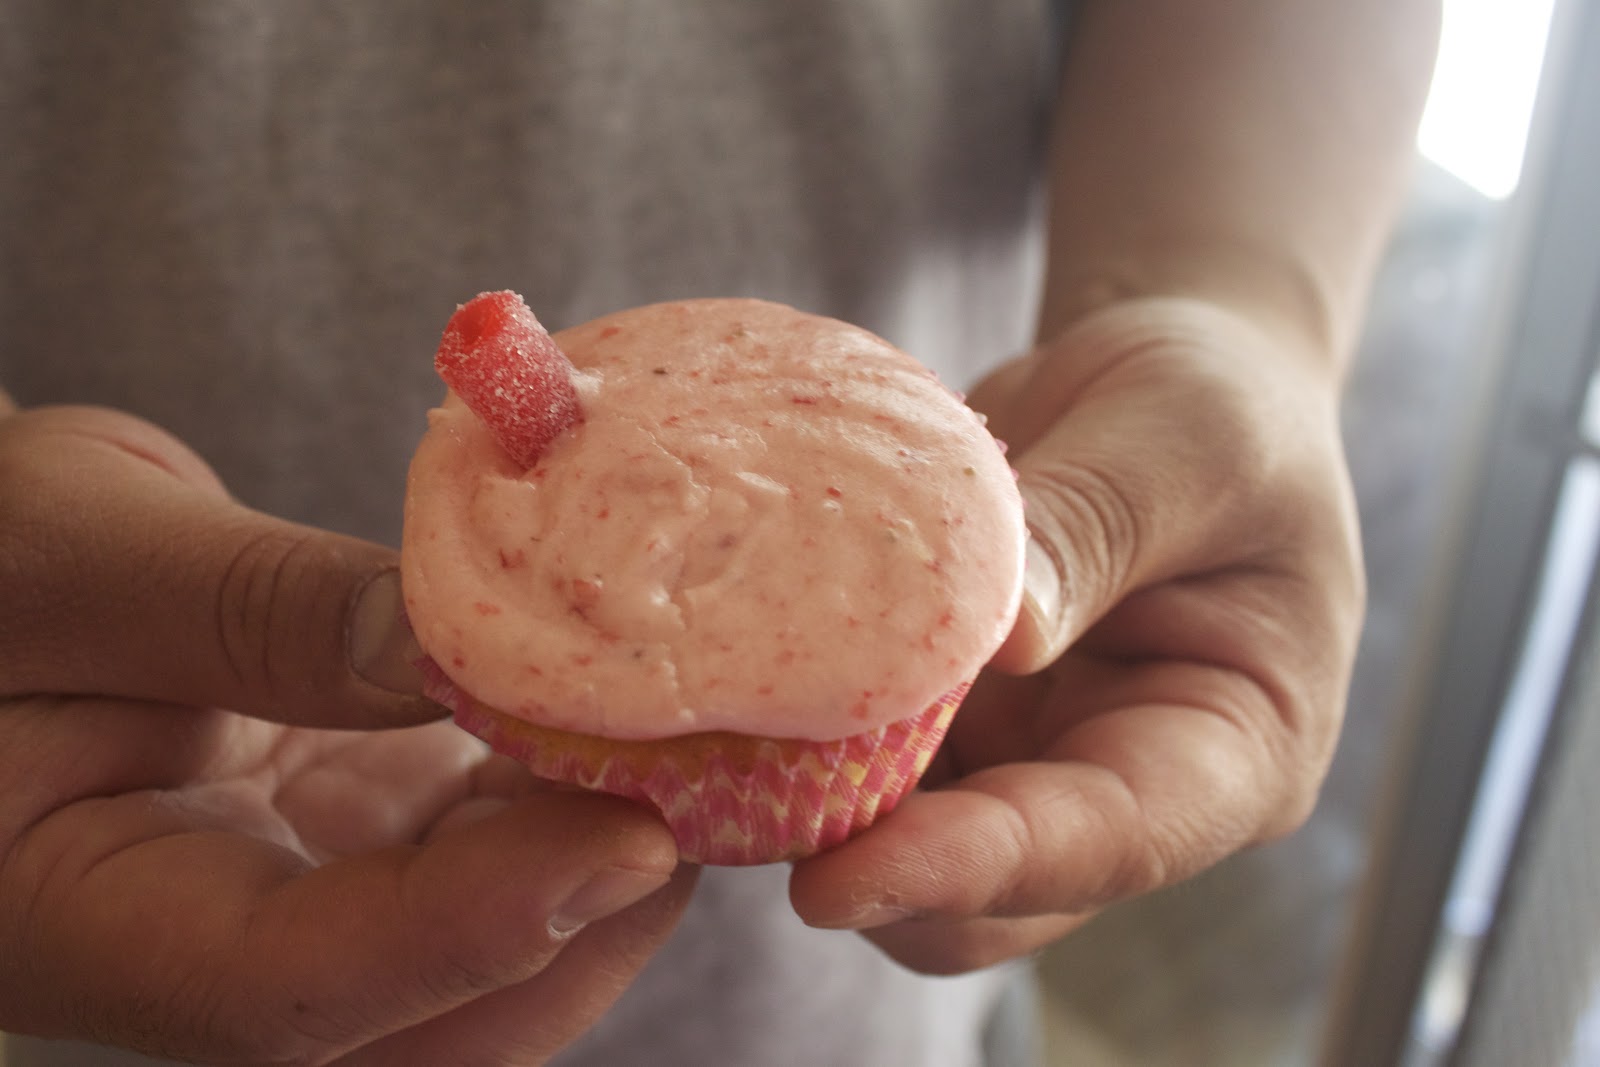
I added a sour strawberry candy straw
1.5 cups fresh strawberries (rinsed, hulled, coarsely chopped)
4 large egg whites
1.25 cups sugar
1.5 cups unsalted butter, cut into tablespoons at room temp (unless it is like 400 degrees in your house, like it was in mine - then your frosting will be very runny...)

Puree strawberries in food processor.

Combine your egg whites and sugar in a heatproof bowl (of your standing mixer) over a pan of simmering water.  Whisk constantly by hand until the sugar is dissolved (should feel totally smooth when you rub between your fingers)

Put the bowl in the stand mixer and start whisking on low and gradually increase to medium/high until stiff peaks form.  Continue mixing until it is fluffy and glossy and completely cooled off from stove time! (about 10 minutes)

Start to add the butter a few tblsps at a time.  Mix well after each.  Then scrape down bowl and switch to paddle attachment - mix for 2 minutes on low to get all air bubbles out.  Add strawberries and beat until combined.

The frosting started drooping right away - "room temp"was just too hot for my butta.  But they tasted delish!

Thursday, May 24, 2012

I'm Legit - too legit to quit.

For Christmas (I know, a LONG time ago...) my sweet husband worked with a dear friend to create business cards for me for my blog and baking.  I am not really interested in creating a business - I mean, I like to bake but I'm not THAT great.  I follow other people's recipes and make them yummy and pretty (well, pretty most of the time at least!)  In addition to the business cards, he ordered me magnets, a coffee mug and stickers to put on boxes when I do bake for special occasions!

I am very thankful for a sweet and creative husband who supports my messing up the kitchen, throwing crazy fits when things don't turn out, while also providing lots of ideas and inspiration for my next projects!


Saturday, April 21, 2012

Fairycakes - They're On a Roll!


A few weeks ago, the husbo and I ventured down to see and taste Moveable Feast in San Jose.  Our best buds in SF took us to Off the Grid last year, and it was super delis and fun!  We lamented that we didn't have anything like that in our neck of the woods.  Well, here we are!  Moveable Feast is in Willow Glen, and has a pretty solid assortment of trucks, including my personal fave - Fairy Cakes!

The truck was super cute - I mean, how can you not love their little fairy with the sassafras ponytail?  They also had a solid selection of classics and interesting combos.  I especially loved their packaging - which was a take-out style box.  There is something very lovely about opening one of those - inside you will either find Chinese food or, in this case, a cupcake!  Either way, I'm happy.


I also really loved that they had sprinkles for the top labeled with feelings that you should go through while eating a cupcake.  Their whole vibe was very fun and playful - I dug it.


For the tasting portion of the evening, I went with a peanut butter chocolate cupcake.  A chocolate cupcake, topped with peanut butter frosting and a dollop of chocolate in the center.  Very plain looking, as you can see, but inviting, nonetheless.


I did enjoy the cupcake.  However, peanut butter frosting is hard.  It is pretty heavy stuff, and it's difficult to lighten up just because of the consistency of the original ingredient.  It was a bit overpowering for me, but still a moist, beautiful cupcake.

I will definitely be going to this truck again, the next time we go to Moveable Feast - They're definitely onto something!!

Taste:  Moist and good cake, but the frosting was a bit much.  But the cake is the hardest part, if you ask me.


Decoration:  Very simple, but classic.


Overall:  Loved the truck.  Loved it.  Cupcakes on wheels?  Yes please.  Fairy mascot?  Love it.  Literal sprinkles on top are the metaphorical sprinkles on top of this yummy little stop.

Buzzzzzzed - Trying to Make it to Tax Day

My wonderful husband, is a CPA.  So every year, from mid January to mid April, I become a "tax widow."  Meaning that my husband leaves for work the same time I do (around 6:30) and gets home between 9:00 and 10:00 - enough time for a cocktail and then bed time.  Except this year, it was longer.  His "season" was unseasonably long, lasting from December through this past week.  It was pretty horrific.  But, the good news is, he's back!  Thank goodness - I miss the guy a lot when he's not around and our poor dog, Taiko, is beside himself with joy every night when Mike comes home.  He will not leave Mike's side for a second.

Many of the wives at the firm where my husband works, send baked goods to keep morale up and keep the CPAs on permanent sugar highs.  And I have tried to do my duty as well - sending in small batches of cupcakes here and there.  But during their last week, I decided to do something special, to keep them all wide awake in order to maximize productivity.

Yummmm - look at all of those coffee grounds....zzzziiing!!!


Vanilla Latte Cupcakes
From - Pink Parsley


Makes 18 cupcakes

Cupcakes

3/4 cup unsalted butter - room temperature
1.5 cups sugar
3 eggs - room temperature
2 cups all-purpose flour
1 tsp baking powder
1/8 tsp salt
1 tbs dark roast coffee grounds
1/2 cup strong brewed coffee
1/4 cup milk/buttermilk
2 tbs coffee liqueur or milk

Preheat oven to 350 degrees, and line your pans with your favorite liners.

In a stand mixer bowl, beat the butter at medium speed with paddle attachment for 30 seconds (until fluffy).  Add the sugar slowly, and beat until light and fluffy - about 3 minutes.

Add the eggs, one at a time, beating well after each.

In a medium bowl, whisk together flour, baking powder, salt and coffee grounds.

In a liquid measuring cup, combine brewed coffee, milk and liqueur.

Alternately add the flour and liquid mixture, starting and ending with the flour.  Mix on low and beat until just incorporated.

Divide batter evenly and bake for 18-22 minutes or until your toothpick/cake tester comes out clean as a whistle!

Frosting

3 large egg whites
1/2 cup granulated sugar
3/4 cup unsalted butter, cut into cubes (softened)
1/2 tsp pure vanilla extract
1 vanilla bean, split & scraped or 1 tablespoon vanilla bean paste
1 tbs instant espresso powder (or to taste) dissolved into 2 tsp boiling water
Pinch of salt

Combine egg whites and sugar in clean and dry bowl of a stand mixer.  Place over a pot of simmering water and heat - whisking constantly.  Sugar should be dissolved and the mixture should reach 160 degrees.

Attach bowl to mixer (with whisk attachment) and, starting at low and working to med-high, beat until the bottom of the bowl cools to room temperature and the egg whites are thick and glossy.  They should form soft peaks.

Continue whisking and add the butter, a few cubes at a time until all incorporated.  Continue mixing until the frosting comes together.  Switch to paddle and over medium speed, add vanilla, vanilla bean, coffee mixture and salt.  Adjust flavorings to taste.  Frost baby!

Tuesday, April 17, 2012

Holy Hiatus, Batman!

Yikes!  I have been baking like a fiend, but too darned busy to log it all!  Life is crazy, but in all the good ways, and has been filled with sweet treats these last few months.  I will take myself off of hiatus status in style, and share with you a very special cupcake that my husband and I have been working on.  


We are very excited to be expecting a baby girl in just 7 more weeks!  These beautiful photos were taken by Caroline Dahlberg of Coeur de La - definitely check her out.  She and her husband were amazing, and captured such an exciting part of our lives!!

The cupcake featured (the edible one) was a pink champagne cupcake - the recipe said that it "didn't matter" the type of champagne, but let me tell you...if you love champagne like I do, it totally DOES matter.  Don't skimp and go the cheap way.  But, they served their purpose on this day.  

Pink Champagne Cupcakes

What better way is there to celebrate than to fuse champagne and cupcakes?  I cannot think of anything more delightful :)

2 3/4 cups all purpose flour
3 teaspoons baking powder
1/2 teaspoon salt
3/4 cup butter
1 2/3 cups sugar
5 egg whites (give the yolks to your favorite pooch!  Mine loves them!)
2 1/2 teaspoons vanilla 1 
1/4 cups of your favorite champagne at room temperature (plus, pour a little extra into a flute to enjoy while baking!)
4-5 drops of red food color (I used bright pink - and mine turned out VERY pink!!)

Heat oven to 350 and line your baking dish with your favorite liners
Mix the flour, powder and salt in a medium bowl
Beat butter for 30 seconds, then gradually add your sugar - 1/3 cup at a time.  Make sure it is well incorporated before adding more
Once all the sugar is added, beat for 2 more minutes
Add egg whites, one at a time - beat well after each
Combine food coloring and champagne
Switch to low speed and alternate dry mixture (1/3 at a time) and champagne (1/2 at a time) - beat until JUST blended - no more or your cakes will be dense little bricks!

Divide batter and bake for 18-20 minutes
(Makes about 24 cupcakes)

Frosting

1/2 cup butter - softened
4 cups powered sugar
1/4 cup champagne
1 teaspoon vanilla
4-5 drops red food color

Throw it all in and mix until it is your desired consistency.  Put into your piping bag with your best tip, and frost away!!

Tuesday, January 17, 2012

Cookies and Creamy Deliciousness!

Things have been super crazy at the Fujii house since Christmas!  Things are always busy around that time, as they are for all of us.  But now that I have finally had a chance to breath and reset, I am back in my baking groove, and with some new tools, I might add!

Check out the awesome mixing bowl Mr. Cupcake got me for Christmas!  (The bowl - we already had the mixer!)


My student, Emma, also treated me to a lifetime supply of cupcake liners!  (Okay, this will last me until summer...)  I love love LOVE all of the different colors and have to make sure I have a rainbow happening before I stick my goodies in the oven.


I don't have Oreo's often, but dang, they are GOOD!!!


I have been diving into the world of Pinterest lately - have you tried it?  It's very addictive.  There are wonderful ideas and recipes on there, and that is where I got the inspiration for this cupcake....the cookies and cream....Originally from Annie's Good Eats!


I have definitely made this before, with my wonderful mandros.....but I didn't document the experience properly, and I wanted to try out this new recipe.  They turned out pretty dang good!  I would definitely make these again.  AND, I think I have found the best recipe for cream cheese frosting yet.  Move over Martha!

If I remember, we actually screwed this batch up...but it's a cute picture!


Ingredients:


Cake
24 Oreo Halves (cream filling attached)
Really, you will use an ENTIRE bag of oreos for this recipe - especially if you eat a few in the baking process.  Like me!
2.25 cups all-purpose flour
1 tsp. baking powder
1/2 tsp. salt
8 tbsp. unsalted butter - room temperature
1 2/3 cup sugar
3 large egg whites - room temperature
2 tsp. vanilla extract
1 cup milk

Frosting
20 Oreo Cookies, coarsely chopped
(I used a combination of the top halves left from the cake part, in addition to some whole cookies.  It's great to have the filling in the cupcake bites too!)
8 oz. cream cheese - room temperature
6 tbsp. unsalted butter - room temperature
1 tbsp. vanill extract
4 cups confectioners' sugar (really just do this to taste.  I used way less, but I like to taste the cream cheese)
2 tbsp. heavy cream (I'm pretty sure this is what made the frosting so wonderfully perfect)
Oreo Cookie crumbs
24 Oreo cookie halves (I wasn't kidding about needing the whole damned bag)

This made about 18 good sized cupcakes for me.

Love the rainbow of liners!  Thanks, Emma!!
Preheat your oven to 350 degrees F.  Get out your favorite colorful cupcake liners and line 'em up!  Put the oreo halves (with the cream filling) filling side up.  One in each liner.


In a medium bowl combine your dry ingredients (flour, powder and salt).  Stir so that it's all mixed evenly.


Featuring my new whisk!  Thanks, Santa!
In the bowl of an electric mixer, combine your butter and sugar.  Beat until light and fluffy (which takes about 2-3 minutes).  Beat in the egg whites - one at a time!  Don't get hasty!  Then add your vanilla.


Scale back your speed to low and add 1/2 of the dry ingredients.  Mix until just incorporated - don't overdo it!  Add your milk until combined and then the rest of your dry ingredients.  Stir in those yummy chopped Oreos until they are evenly incorporated.  If, in your expert opinion, you need more Oreos - add more Oreos.   Don't over mix 'em.

Nom nom nom!


Divide batter evenly into each liner.  Bake for 20 minutes, rotating 1/2 way through.

For the frosting, combine the cream cheese and butter in an electric mixer (having more than one bowl REALLY comes in handy here -then you don't have to do dishes in between!)  Blend on medium'high until smooth.  Add vanilla and then sugar until smooth.  Then the heavy cream until incorporated.  Then jazz it up to medium high and whip for 4 minutes.  This frosting is perfection.  Put on your favorite piping tip and go to town!

Garnish with Oreo halves and crushed cookies.  Eat and be merry.

LinkWithin

Related Posts Plugin for WordPress, Blogger...