I shared my idea with Mike, my husband, and he helped brainstorm what the best possible way to tackle these bugs would be. He chose the cupcake flavor for the day, ran to the store, and our adventure began.
When you have such a fun decoration on the top, and when you are making cupcakes for a 2nd birthday, it probably isn't super important what type of cupcake is underneath. But, I care. And I knew a lot of my friends and colleagues would be there, and they would appreciate a yummy cupcake that wasn't just cute, but delicious as well. We decided to go with a Devil's Food chocolate cupcake. I LOVE this recipe (have I written about it before?) The sour cream makes it so flippin' moist - it is the best chocolate cupcake ever. Seriously.
 |
| Fresh outta the oven! |
 |
| These would probably taste bomb with my new favorite cocktail - Sweet Tea Vodka + Lemonade.... Just saying... |
 |
| I love this thing. I got two of them for my bridal shower, and I think they are the bee's knees. |
 |
| They're done! Read to be ladybugged! |
 |
| Another bridal shower gift - today's apron of choice. |
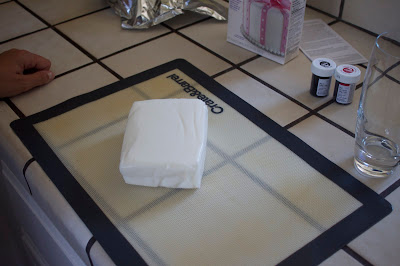
So, fondant is weird looking. It looks, to me, like a huge brick of lard. Not very appetizing. It was hard for me to imagine how we were going to transform this blob into something cute for a kid's birthday party.
 |
| Bloooooooooobbbbbbbbb...... |
 |
| Our fondant dye |
Then, it was time to get rolling! Mike rolled out the fondant into a thin layer. He is very good at this job.
Then, we took one of our cups, and cut out red rounds. These are going to be our ladybug base.
In order to get the fondant to stick, we put a very thin layer of frosting on there. By thin, I mean VERY thin. Due to time constraints, we just used store bought frosting (shhhhh - don't tell anyone!) But whatever - one less dish, thank goodness!
We popped those red discs on right away, and they looked so cool! I mean, they didn't really need much else IMO, but we knew they could only get cuter! There was something both Mike and I appreciated about the smooth and clean line that the fondant created. It just looked so neat and tidy! Something we both love.
From there, we started crafting their little heads. For this, Mike simply took the edge of the same cup to create little parts of discs that folllowed the same curve as the red rounds.
To get the black to stick on top of the red fondant, we brushed it with just a little bit of water! Stayed on like glue!
After that, it was eye balls (and we used white decorating pearls) and their little dotted backs. For the polka dots, we actually used the tip of a piping tip - size #12. It worked perfectly!
We got to the birthday party, and saw the cute printed table cloths - ladybug! Our cupcakes fit right in!

We thought it was a success, but the ultimate judge was, of course, the birthday girl, Marisa. Here's what she thought:


Cute! I haven't used fondant yet either, but it doesn't seem as complicated as I thought it would be! Now if they could only make it taste good...
ReplyDeleteso cute - great job to both of you! and p.s. sweet tea vodka and lemonade is my current fave as well! great minds. :)
ReplyDelete